> ## Documentation Index
> Fetch the complete documentation index at: https://docs.skyfree.io/llms.txt
> Use this file to discover all available pages before exploring further.
# Google oauth
The **Google API Integration** page allows you to connect your platform with Google services using OAuth authentication. This enables users to securely link their Google accounts and use features such as Google Sheets, Calendar, and Contacts within the platform.
This integration is essential for automation, data synchronization, and workflow enhancements.
***
## What This Is Used For
Once configured, users can connect their Google accounts to enable:
* **Google Sheets** → read/write data for automation and syncing
* **Google Contacts** → import and sync contacts into the platform
* **Google Calendar** → create and manage events via automation
* **User Profile Access** → fetch basic user information
These integrations help extend platform capabilities and enable real-time workflows.
***
## Required OAuth Scopes
The following Google OAuth scopes are required for full functionality:
* [https://www.googleapis.com/auth/spreadsheets](https://www.googleapis.com/auth/spreadsheets)\
→ Read and write Google Sheets
* [https://www.googleapis.com/auth/contacts](https://www.googleapis.com/auth/contacts)\
→ Read and write Google Contacts
* [https://www.googleapis.com/auth/calendar](https://www.googleapis.com/auth/calendar)\
→ Read and write Google Calendar
* [https://www.googleapis.com/auth/userinfo.email](https://www.googleapis.com/auth/userinfo.email)\
→ Access user email
* [https://www.googleapis.com/auth/userinfo.profile](https://www.googleapis.com/auth/userinfo.profile)\
→ Access user profile information
These permissions are required for the platform to interact with Google services on behalf of the user.
***
## How to Configure Google OAuth
### Step 1: Go to Google Cloud Console
Open: [https://console.cloud.google.com/](https://console.cloud.google.com/)
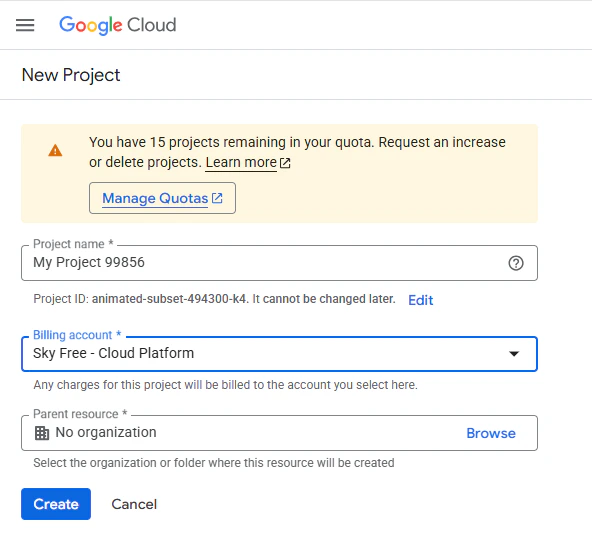
### Step 2: Create or Select a Project
* Create a new project OR Select an existing project
 ### Step 3: Enable Required APIs
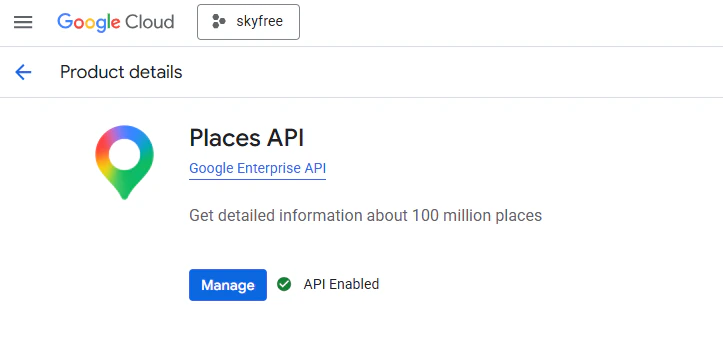
Go to **APIs & Services → Library** and enable:
### Step 3: Enable Required APIs
Go to **APIs & Services → Library** and enable:
 * Google Sheets API
* Google Calendar API
* Google People API (for contacts)
* Google Maps API (for Inbox)
* Google Translate API (for Inbox)
* Google Sheets API
* Google Calendar API
* Google People API (for contacts)
* Google Maps API (for Inbox)
* Google Translate API (for Inbox)
 ### Step 4: Complete OAuth Consent Setup and Verification
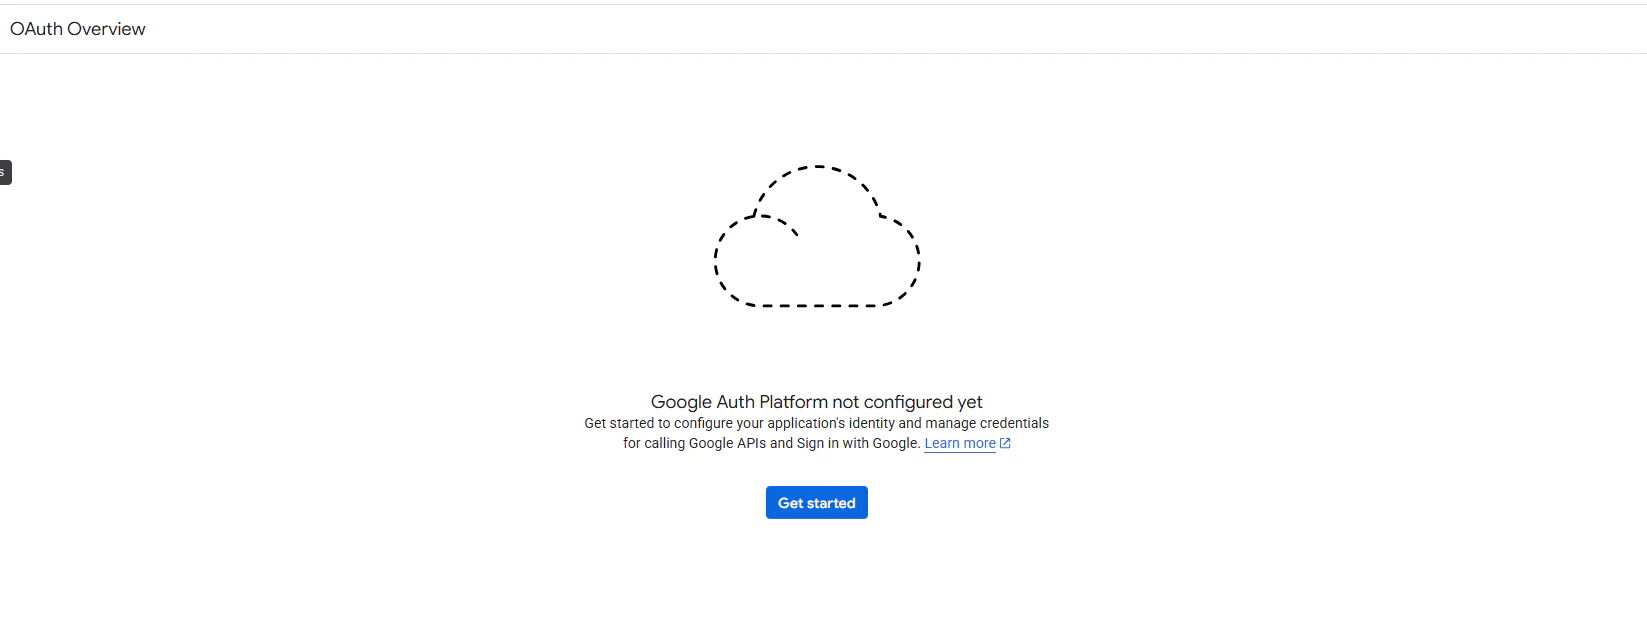
After creating your project, you must fully configure the OAuth consent screen in the Google Cloud Console.
Go to **APIs & Services → OAuth consent screen**
### Step 4: Complete OAuth Consent Setup and Verification
After creating your project, you must fully configure the OAuth consent screen in the Google Cloud Console.
Go to **APIs & Services → OAuth consent screen**
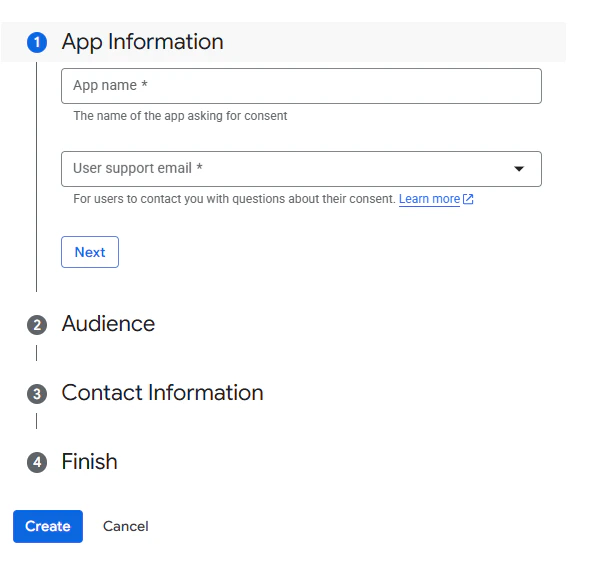
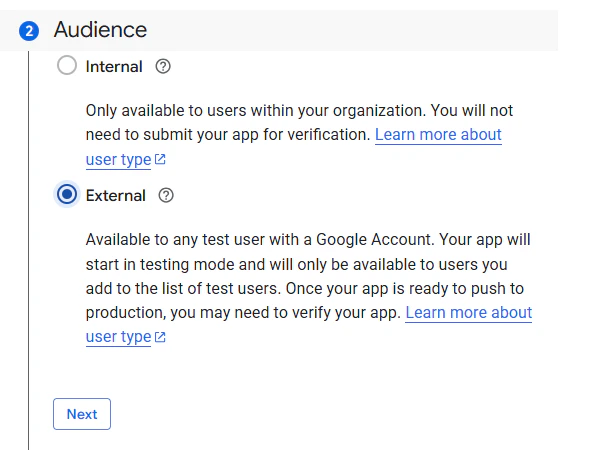
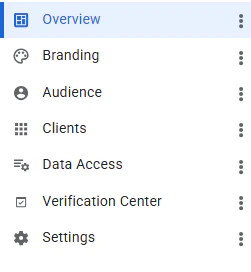 Ensure that all required sections are completed, including:
 * Branding (application name, logo, support email)
 * Audience (internal or external users)
 * Clients (OAuth client configuration) - ***Refer Step 5***
* Data Access (required scopes and permissions)
* Settings (general app configuration)
Once all sections are properly configured, proceed to the **Verification Center** and submit your application for verification if required.
Verification is mandatory when using sensitive scopes such as Google Sheets, Contacts, or Calendar. Until verification is approved, access may be limited to test users only.
***
### Step 5: Create OAuth Credentials
Go to **APIs & Services → Credentials**
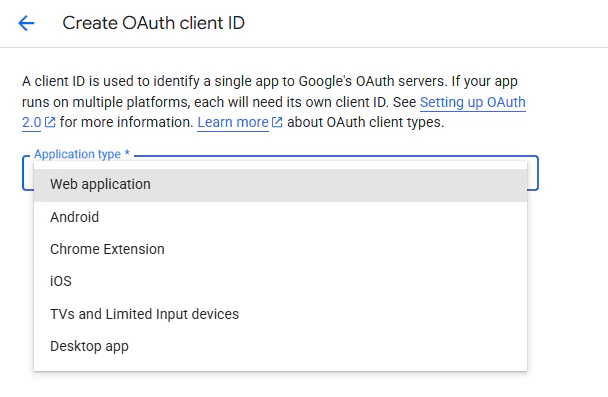
* Click **Create Credentials → OAuth Client ID**
* Select:
* **Web Application**
* Clients (OAuth client configuration) - ***Refer Step 5***
* Data Access (required scopes and permissions)
* Settings (general app configuration)
Once all sections are properly configured, proceed to the **Verification Center** and submit your application for verification if required.
Verification is mandatory when using sensitive scopes such as Google Sheets, Contacts, or Calendar. Until verification is approved, access may be limited to test users only.
***
### Step 5: Create OAuth Credentials
Go to **APIs & Services → Credentials**
* Click **Create Credentials → OAuth Client ID**
* Select:
* **Web Application**
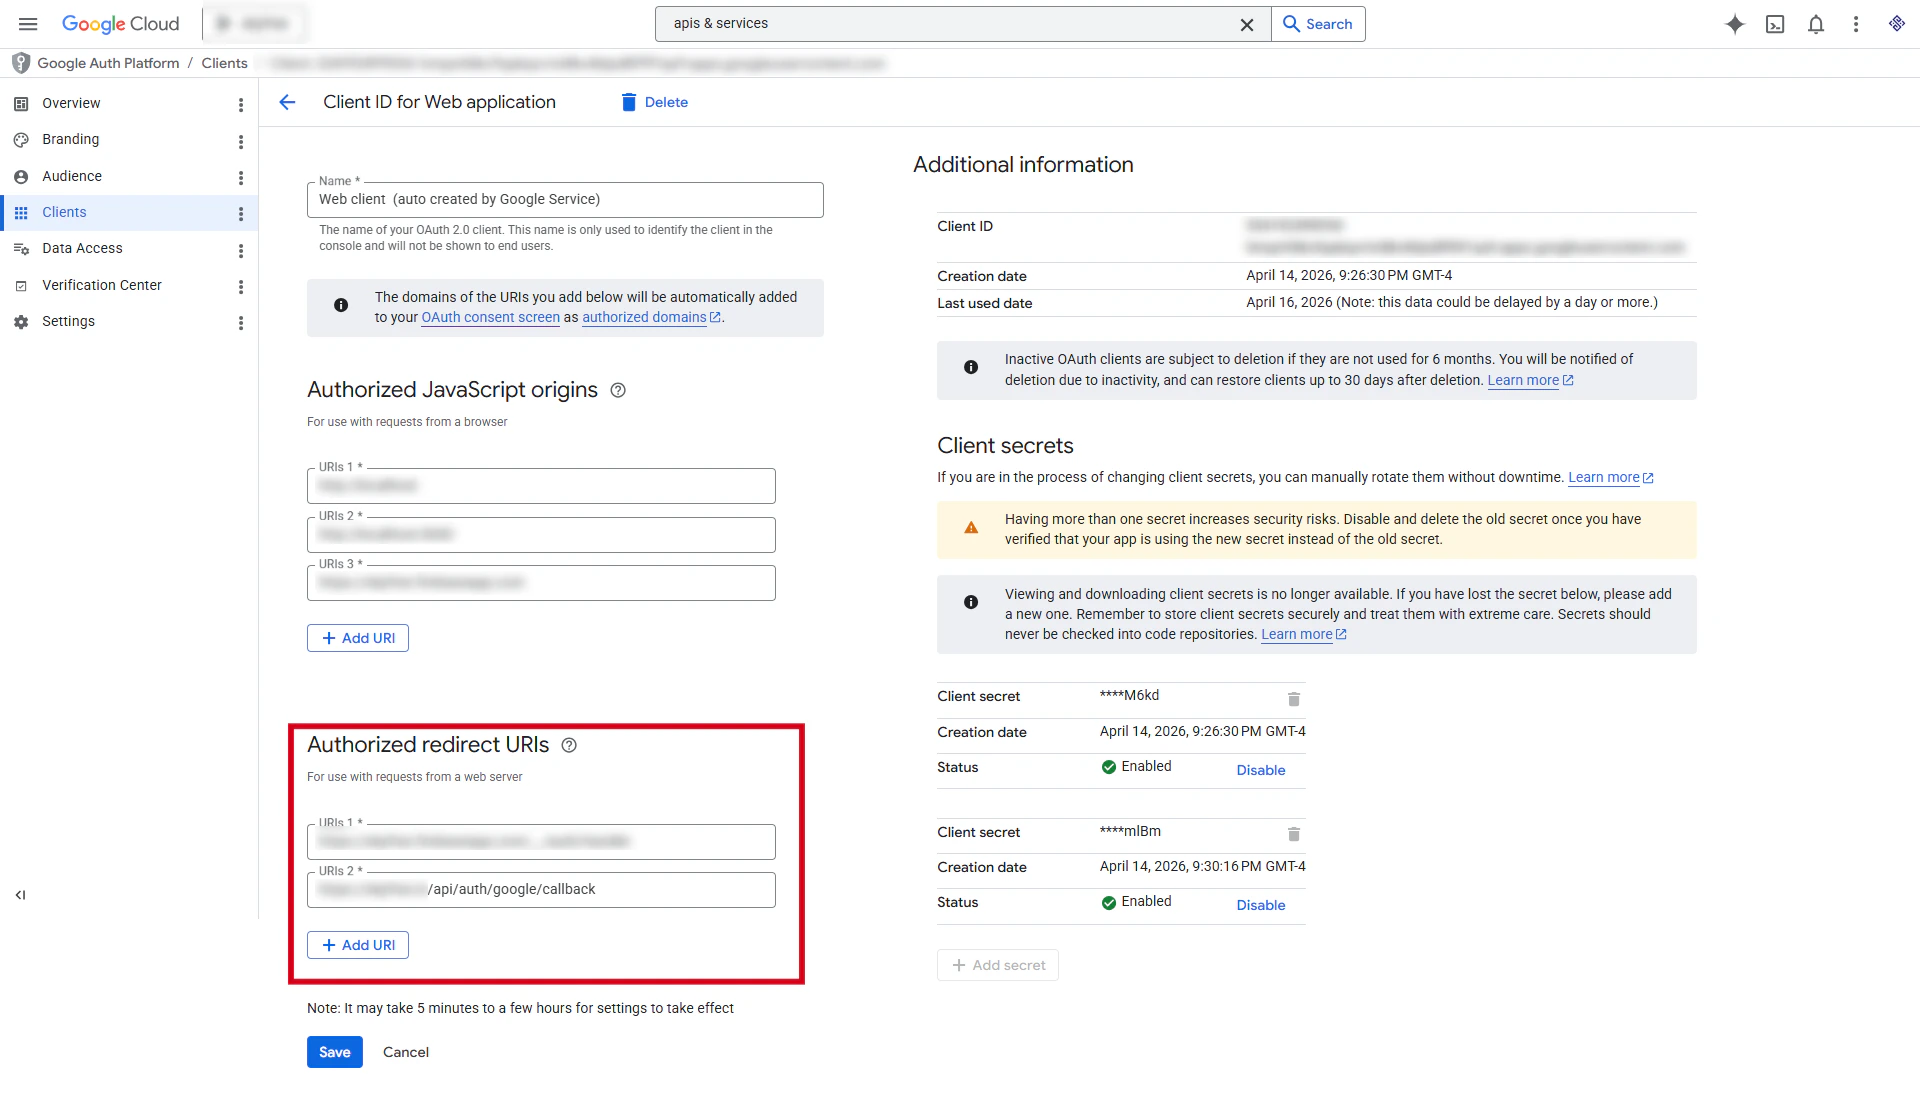
 * **Add Redirect URI**
Add the redirect URL from your platform: [https://your-domain.com/api/auth/google/callback](https://your-domain.com/api/auth/google/callback) (Use the exact URL shown in your platform settings)
* **Add Redirect URI**
Add the redirect URL from your platform: [https://your-domain.com/api/auth/google/callback](https://your-domain.com/api/auth/google/callback) (Use the exact URL shown in your platform settings)
 ***
### Step 6: Copy Credentials
After creating credentials, copy:
* **Client ID**
* **Client Secret**
* **API Key** (from credentials section)
***
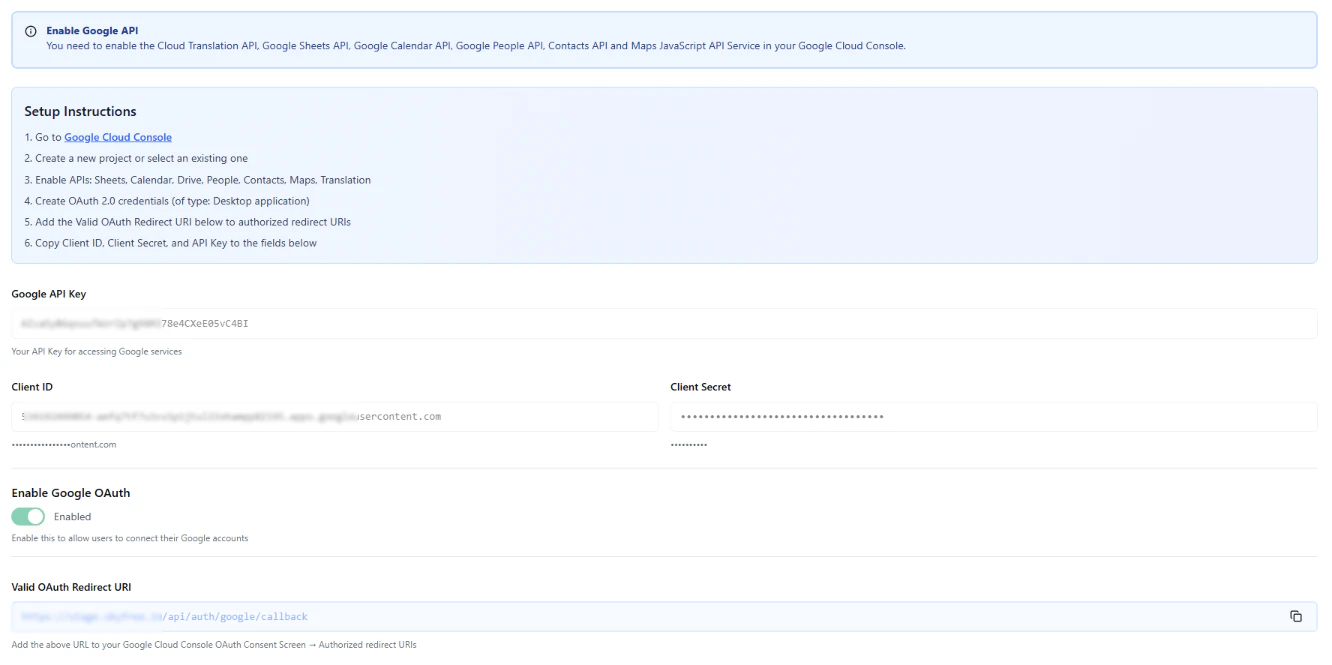
### Step 7: Configure in Platform
Go to **Google API Integration** page and:
* Paste API Key
* Paste Client ID
* Paste Client Secret
* Enable Google OAuth
* Save settings
***
### Step 6: Copy Credentials
After creating credentials, copy:
* **Client ID**
* **Client Secret**
* **API Key** (from credentials section)
***
### Step 7: Configure in Platform
Go to **Google API Integration** page and:
* Paste API Key
* Paste Client ID
* Paste Client Secret
* Enable Google OAuth
* Save settings
 ***
## Testing the Integration
After saving:
* Click **Test** (if available)
* Try connecting a Google account
* Verify that Sheets, Contacts, and Calendar access works correctly
***
## Verification (Important)
If your app is in production and uses sensitive scopes (like Contacts or Sheets), Google may require **OAuth verification**.
You may need to:
* submit your app for verification
* provide a demo video
* explain how data is used
* verify domain ownership
Until verified, your app may be limited to test users.
***
## Security Notes
* Keep your **Client Secret secure**
* Never expose credentials in frontend code
* Use HTTPS for all redirect URLs
* Restrict API usage where possible
***
***
## Testing the Integration
After saving:
* Click **Test** (if available)
* Try connecting a Google account
* Verify that Sheets, Contacts, and Calendar access works correctly
***
## Verification (Important)
If your app is in production and uses sensitive scopes (like Contacts or Sheets), Google may require **OAuth verification**.
You may need to:
* submit your app for verification
* provide a demo video
* explain how data is used
* verify domain ownership
Until verified, your app may be limited to test users.
***
## Security Notes
* Keep your **Client Secret secure**
* Never expose credentials in frontend code
* Use HTTPS for all redirect URLs
* Restrict API usage where possible
***